


Eclipse Essentials: Must-Have Camera Gear for Capturing Celestial Events

Time-lapse of the 2024 Solar Eclipse
Simulated author reading of this article
Eclipse Essentials:
Must-Have Camera Gear for Capturing Celestial Events
This is a list of tools that I used to capture the 2024 solar eclipse. In the future, I will write a more detailed post about how I used each piece of equipment listed here.
Canon EOS R10

Canon EOS R10 RF-S18-150mm F3.5-6.3 is STM Lens Kit, Mirrorless Vlogging Camera, 24.2 MP, 4K Video, DIGIC X Image Processor, High-Speed Shooting, Subject Tracking, Compact, for Content Creators Black.
I’m a big fan of Canon. I’ve been using Canon cameras for digital photography since 2005, and I’ve never had a problem. I highly recommend them. Currently, I use the Canon R10, and for the rest of this article, the equipment I’ll be recommending will support Canon Cameras.
2. EF to EOS R Mount Adapter

NEEWER EF to EOS R Mount Adapter, EF/EF-S Lens to RF Mount Camera Autofocus Converter Ring Compatible with Canon EOS R Ra RP R6 Mark II R6 R5 R3 R7 R10 R8 R50
If you purchase a Canon R10, I think this adapter should be purchased as well as a requirement. The equipment in this article will need this lens mount. This will allow you to use all EF and EF-s lenses that came before the R10 and Canon mirrorless cameras. This includes lenses that were designed for their fantastic DSLRs. There is nothing bad about the EF and EF-s lenses. The quality is still good; It’s just that the distance they were meant to focus on the film or digital sensor is different than the current Mirrorless cameras. They are, on average, larger ns heavier than the RF equivalent. This is called the "flange focal distance" or "flange back distance." This is simply a spacer that holds the lens at the correct point. I recommend this one because it has a tripod mount similar to a lens collar. This is often used with a large, heavy telephoto lens. Instead of placing all the weight on a camera that’s attached to the camera, the tripod holds the lens and the lens actually holds the camera. This reversal helps to save the camera and lens from damage to the lens mount. This mount adapter uses a similar principle that would be applied to all the EF and EF-s lenses you attach to the camera. However, you should still use the lens collar, which comes with a very large and heavy lens. I would say any lens that is over 300mm. except for the lens, I’m going to recommend later in the article. But this is an exception.
3. DWARF II Smart Telescope
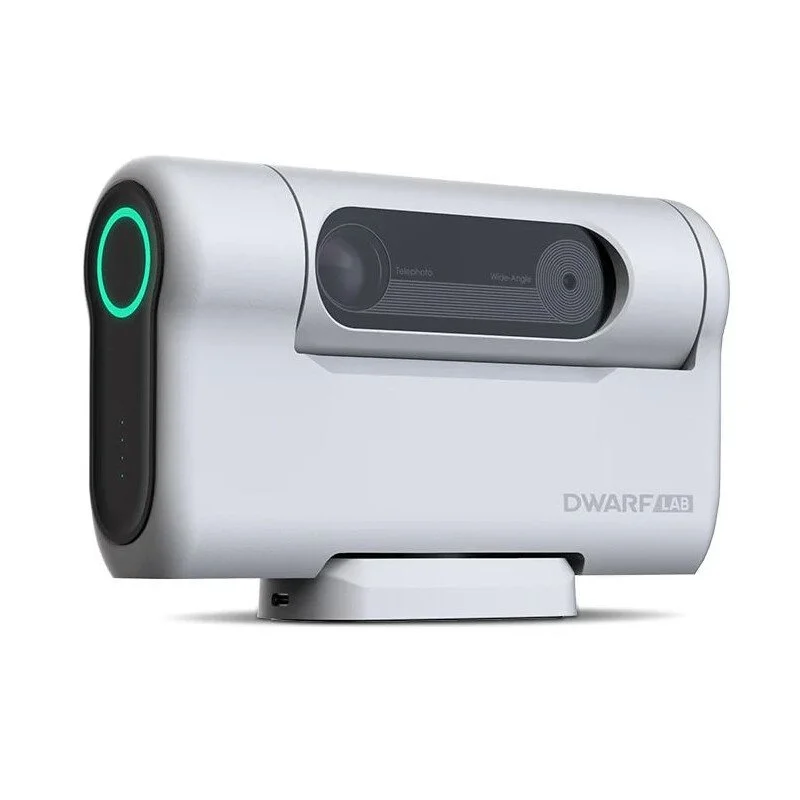
1. DWARF II Smart Telescope Deluxe
The Dwarf II Telescope is what is called a smart telescope. This is a stand-alone device(you do need an IOS or Android. It is the telescope and camera combined. You have to control it by using a phone or tablet. I really enjoy using this telescope because it is pretty easy to set up and get some good images straight out of the box. When using it at night to take photos of celestial objects, you need to point the lens at the sky, and it will calculate where it is looking. Then, from the app, you select either from a list of stars and nebulas or enter coordinates manually, and the smart telescope will find that constellation, galaxy, nebula, or planet and track it across the sky, compensating for Earth’s rotation. While it is not an equatorial mount, it is an alt-azimuth mount; you can set it up to mimic an equatorial mount. You simply have to have it face true north and tilt the tripod base at the degree of latitude of the location you are at. So if you’re latitude at your location is 42 degrees, you would tilt the dwarf base to an incline of 42 degrees if you’re in the northern hemisphere. This process will increase the quality of the photographs removing the issue of field rotations. It also has a built-in feature that will stack the images while taking images of the sky. Stacking is the process of taking several photographs of the sky and then combining each one together in order to create a higher-quality longer exposure final image.
If you get the Deluxe edition, you will also get the solar filters set. The app has a built-in feature for following the sun, and it is very important that you only aim it at the sun with the solar filters on. This smart telescope has two cameras, a wide angle and a telephoto telescope. When shooting the sun BOTH CAMERAS must half the solar filter on. The Dwarf comes with a clever filter mount that will hold both solar filters over both camera, but you must remember to use both solar filters on. Otherwise, the sun could literally fry and ignite the camera. This is true of any camera when aimed at the sun.
I must also note that it can be used for wildlife photography during the day and has some very impressive AI features that will actually track moving objects, such as People, vehicles, and animals—any real set of moving shapes/objects. You simply select the object in view in the app, and the smart telescope will track it.
4. Solar Filters
As I said, for the Dwarf II, you need a solar filter whenever you’re taking photos or videos with the camera aimed directly at the sun. Solar filters can be very pricey, so I was surprised when I found these rather inexpensive versions for DSLR lenses. They are made out of the same materials as the disposable solar eclipse glasses. It’s a cardboard frame that you fold into a cylindrical shape that goes on the outside of the camera. I am extremely happy with the result and the price. As I said, they are somewhat disposable. However, I will keep mine as long as possible because they have proved very useful, especially at their price point.

Solar Filter - Universal Lens Filter 50mm
5.Amazon Fire Tablet
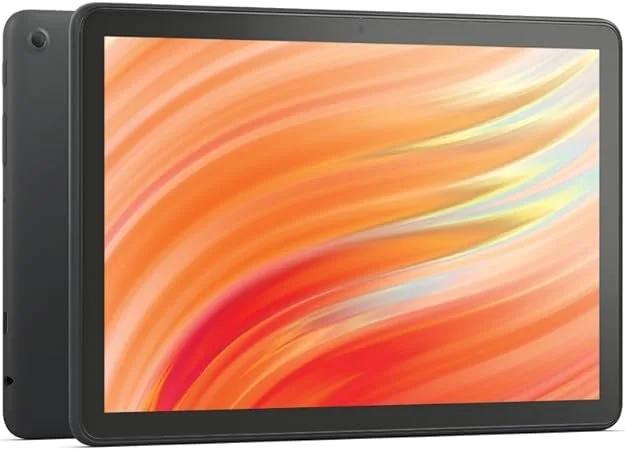
I needed a spare tablet that would control my smart equatorial mount so I decided to try the Amazon Fire tablet. It was a very affordable tablet, and I used it to connect to the Dwarf II and have it control the Dwarf telescope through the Dwarf Labs App. I actually tried with another Android tablet. However, I preferred using the Amazon Fire and returned the other one. I must note that the tablet does not have GPS and you need location data for astrophotography. This isn’t an issue for me because I get the GPS coordinate data from my phone, and you can input it into the Dwarf app.
6. 500mm Telephoto Mirror Lens

500mm Telephoto Mirror Lens
This is a very inexpensive lens that uses a set of curved mirrors instead of optical lenses. I’ve found that this lens works well in daytime photography as well as with astrophotography. It does have some unique characteristics, however. In some instances, areas of the image are out of focus due to being outside of the depth of the field, which will produce donut rings. This doesn’t happen all the time. I think it’s fine; however, some photographers hate it. So I feel I must warn you about it. I believe, however, that the prices and the quality are worth it. The other thing that I must note is that it is a very manual lens. There is no autofocus, and you can not change the aperture. It has an f-stop of 6.3, which is somewhat good for an inexpensive 500mm lens, but that also means that the depth of field is razor-thin. So, if you miss you’re focused by a couple of inches, it will look very out of focus. It is also much lighter than a normal 500mm lens that uses glass instead of the mirror system. It’s possible to use this handheld in terms of weight, but the slight shake of the camera will look like an earthquake through the lens. A tripod is highlight recommended for this lens. You also don’t need a lens collar necessarily. This bundle uses an EF mount, so you will need the EF mount adapter if you use the R10 Camera that I recommended previously.
7. 2X Telephoto Converter
I used this teleconverter on the Mirrored lens I mentioned above. This will multiply the focal length of the lens by two times. This means that the 500mm lens will become a 1000mm lens. It is important to note that Tele converters can lower the quality of the image. This is due to the process of multiplying the focal length and the lens. If you have a low-quality lens, the focal length multiplication will also be low quality and even more exaggerated. For the 500 mm lens I mentioned above, the quality is reasonable, and multiplying by 2 times still produces usable images. I also must note that this is for a T-Mount lens. So it is designed to work with the 500mm mirror lens. You would screw the tele convert to the lens and then you would screw the T-mount to the camera mount adapter. It’s a very easy process.

Opteka High Definition 2X Telephoto Converter
8. Canon EF-S 55-250mm
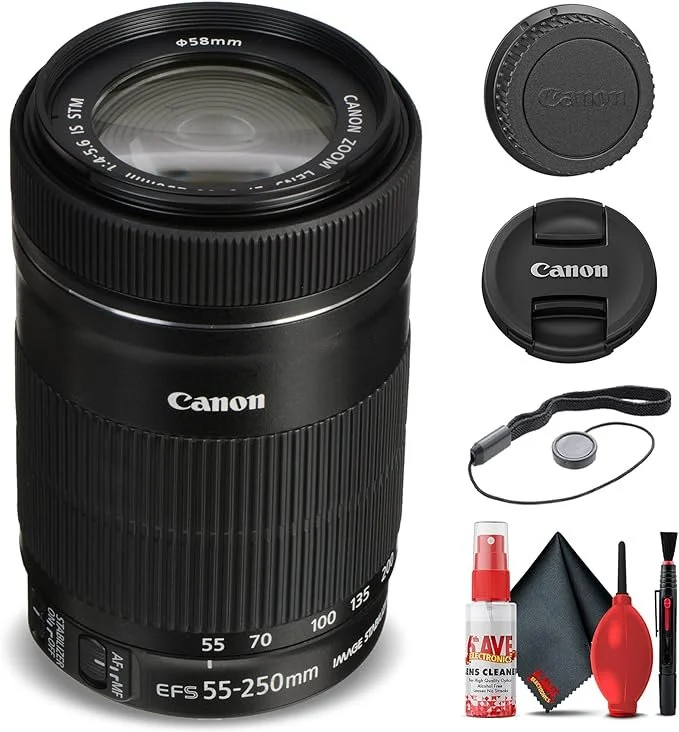
The other lens that I used was the Canon EF-S 55-250mm Lens. This is somewhat of a kit lens, which means that if you bought a Canon camera kit, you probably received it with this lens. I’ve found that this lens is versatile and useful when traveling. It is a zoom lens that is easy to hold and has a nice magnification.
9. Micro SD

I own several of these memory cards and I have not had an issue with them. I’ve used them in 360 cameras, High framerate cameras, and more. I’ve never had a performance issue with them. I needed 128GB because I did not shoot this Solar eclipse as a video. It’s actually a timelapse video where I take one raw image every second. This produces a huge amount of data, and you need a high-quality, speedy memory card that will not fail.
10. Power

One of the issues with astrophotography is that you need your camera to take images for hours at a time. While camera battery technology has become more efficient and lasts longer, the issue is that nighttime photography is usually very cold. With that shooting environment, all batteries do not last as long in cold temperatures. This makes it difficult to shoot hours-long image sequences. For this reason, I use this adapter for my Canon R10. This adapter allows me to plug my camera into a wall socket and run off the power from my house. There is no need for batteries to charge. I connect to a long extension cord, and I can take photos all night long. I’ve also had good results when connecting this adapter to an AC portable power pack for shooting where no power outlet is available.
11. iOptron SkyGuider Pro

iOptron SkyGuider Pro Camera Mount
I must admit that I did not use this piece of equipment for this 2024 video. However, almost every time I’m out at night taking photos of celestial objects, I use the SkyGuider Pro. I highly recommend this Sky guider Pro. The reason why I went with the Pro version is because It allows me to attach two DSLRS, one at each end, and I can take photos of two different celestial objects at once. Or I can take two images of the same celestial object but with different lenses and, therefore, different focal lengths. Once you get the hang of it, it’s extremely easy to set up, and the complete kit comes with everything you would next, except for a tripod. You will need a heavy-duty tripod, however.

12. iEXOS-100-2
Now, you need to get these last two items together. I do not have the Azimuth Adjuster, and I regret it. I am going to purchase it in the future. This equatorial mount is similar to the sky glider, which will compensate for the earth's rotation while taking astrophotographs. However, the difference is that this one has a built-in go-to function. This means with the iPad or Android tablet and even a Windows laptop, you tell the mount what object you would like to look at, and it will aim the camera/telescope at that object. I have to warn you; this only works with tablets and PCs or laptops. There are also options for Macs, but it involves just a little more work to get going. It does not work with smartphones however, just tablets and PCs. It offers several ways to calibrate it and it can even run off battery power with the included C battery pack. In this video, I created my own contraption to hold two lightweight cameras. I don’t recommend this. But using one camera and this mount produces extremely high-quality images of the night sky or, as in this video, the solar eclipse.

iEXOS-100-2 PMC-Eight Equatorial Tracker System with WiFi and Bluetooth Compatible
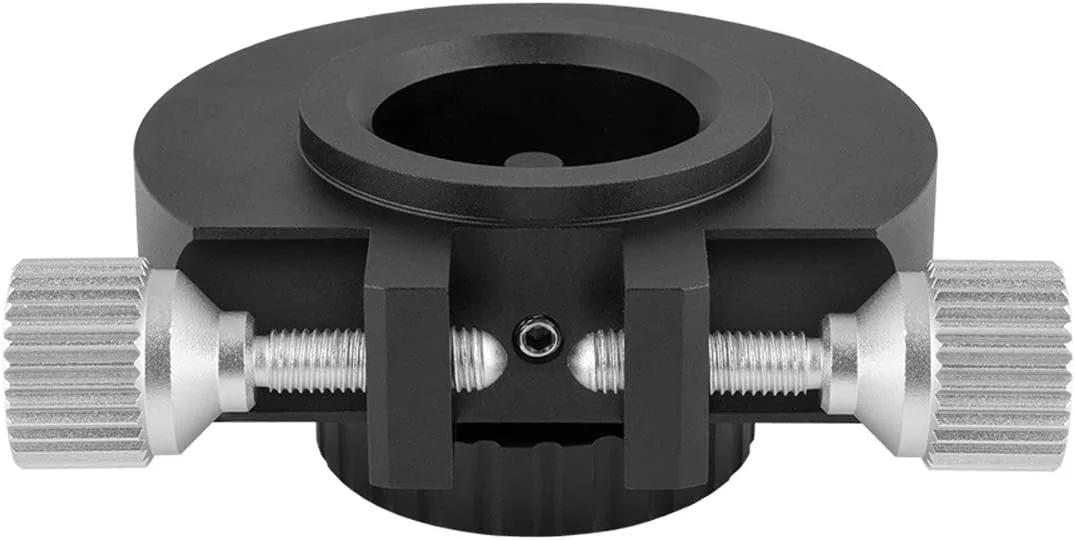
Explore Scientific iEXOS-100 Azimuth Adjuster Adapter
I hope this helped you in learning about astrophotography and solar eclipses. I will be making more astro photography films and look forward to sharing them with you.
Products featured in this blog post participate in the Amazon Services L L C Associates Program, an affiliate advertising program designed to provide a means for us to earn by linking to Amazon.com and related sites.

Video edition of the Photations Live to Tape podcast featuring the Junior Classics Vol.1 Fairy and Wonder Tales reading